We’ve looked at how you can use Google’s own data to test and improve your website traffic and conversions.
One of the key areas they urge you to consider is the page load speed.
I know, I know, it sounds very technical and pedestrian.
I mean surely it’s ALL about the marketing, the copy, the great ideas, your amazing product and the offer?
Well, yes, of course they are crucial.
But…
As Google’s stats have pointed out, you’ll lose over HALF of your website visitors if your page takes longer than three seconds to load.
So think about it…
You could potentially DOUBLE your website traffic (and therefore increase blog post views, clickthroughs, enquires, email subscribers and sales) simply by speeding up your website.
We put so much effort into finding content, writing copy, promoting ourselves on social media and paying for advertising… it seems a shame to waste half of those results purely on a technical issue.
Especially when they’re easily fixable…
As I said previously, there are tools and reports you can find on Think With Google that you can access to address a lot of these problems,
But today I wanted to pass on a few design tools you can use to help fix one of the biggest speed hogs on your website: images.
Why you should resize your photos (and how to do it)
Images with large file sizes burden your website and slow it down.
There’s a common misconception that shrinking the file size of the image means you have to shrink it’s display size.
This simply isn’t the case, you can shrink the file size of an image without affecting its display size in the slightest.
What shrinking the file size will effect is the resolution. But here’s the thing, most people will be viewing images on your website on a mobile phone, tablet, laptop or desktop computer… not a cinema projector.
So that means your images can be small (certainly under 1mb and preferably under 100kb as a general rule of thumb).
So how do you do it?
One option is to use Adobe Photoshop. This is the route taken by most professionals, but it’s not cheap at £9.98 for the “Photography Plan” – which includes Photoshop – or £19.97 a month for the single app plan. The former is a much better deal at the time of writing.
You can get a 7 day free trial on Photoshop here.
Photoshop lets you enhance, crop, caption, resize – pretty much do anything you like to an image before you upload it.
To shrink the file size of an image, load it up and then click File > Export > Save for Web (legacy). You can then tinker around with the different options to get the size down.
In my view, if you’re going to resize or customise photos every week for your website, email, social media and sales promotions, it’s worth having.
However, what if it’s something you only need to do occasionally?
In that case you might not want, nor really need Photoshop.
Tool #1: ‘Be Funky’ – A free alternative to Photoshop…
There’s a service called Be Funky which has a free picture editor. You have to put up with some ads and there are a few limits to what you can do – but it does the job.
Here’s a photo image I uploaded (context, I took this on a trip to Dungeness and was startled to see that a fisherman had disintegrated into a big plastic bucket).
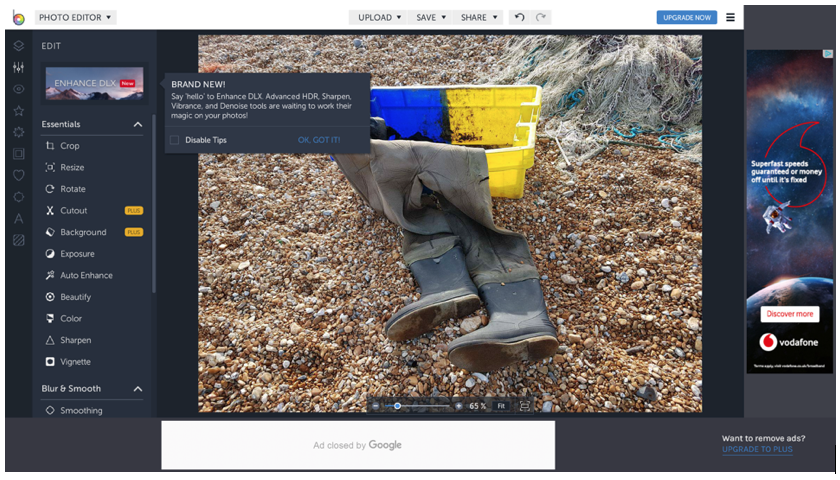
If you look on the left-hand sidebar, this website will let you:
- Crop
- Rotate
- Enhance
- Adjust colour
- Sharpen
And, yes, resize too.
As a simple tip, you don’t even need to go to ‘resize’ on the left-hand side.
Just upload the photo, go to the top menu and click SAVE. It will allow you to save as either a JPEG or PNG. There’s a little bar you can slide down beneath that image to reduce the quality of the image (and the size).
It means you could get a picture ready for Twitter, Facebook, your email newsletter or blog in a few seconds, and for free. No skills needed.
Of course, it’s not all about photos and resizing.
You might also want to create charts, diagrams, flyers, infographics, and other images.
Again this is something you can use Photoshop for… or you can access a free, user friendly version tool for “non designers” called Canva.
Tool #2: How to use Canva to make professional looking designs and graphics on your website and Social Media for free
You can join up to Canva for free using your email, Gmail or Facebook account.
It takes you through everything, holding your hand a bit more – giving you options as in the screenshot below.
You can choose what you want to design, then they give you little onscreen demos of how to use it.
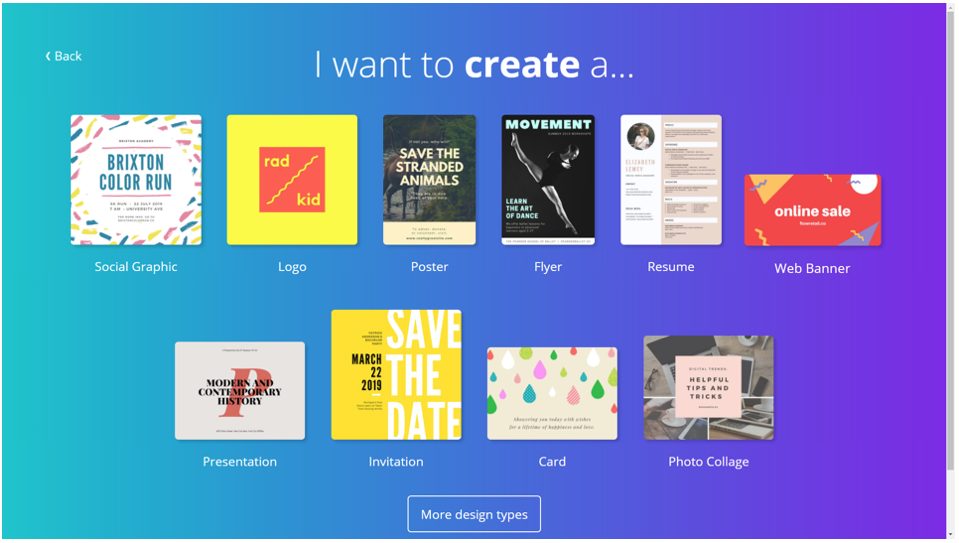
Click on one of these and you can access ready-made templates, and access a selection of images and icons from their database.
If you often have to make ads, banners, flyers, brochures, leaflets and other designs for your business, this is ideal.
Also if you’re a big user of Instagram, for business or pleasure, it’s great as you can add text to your images.
For example, you can create funny captions, add logos, or turn images into motivational posts.
It lets you to crop, edit, add lines, squiggles and put filters on the photo, all with preset deigns and templates to remove any need for technical skills.
However, you’ll notice that some of the features come with the premium service. If you want to use Canva with all the whistles and bells there’s a $9.95 per month subscription option.
This includes a ‘resize magic’ tool also ensure that the graphics you create will look great without slowing down your website.
It also gives you access to 300,000 photos, illustrations and icons on the Canva site. If you’re in need of some striking photos to add to your website and emails, this is a good benefit.
Tool #3: Using WordPress? Here’s a zero effort FREE way to shrink down images on your website
A superb tool for WordPress users is WP Smush.
It’s a plugin you can install in seconds and does ALL the heavy lifting for you when it comes to image sizing.
It analyses each image you upload (as well as any existing images if you want it to) and then compresses the files without you having to lift a finger.
The ‘smushed’ images look indistinguishable (to my eyes at least) and it requires no coding, tinkering or effort on your part. It’s a completely automated process.
Honestly, this is a gem and I’ve used it on every site I’ve built.
That’s it!
I hope you found this helpful. If you’ve used any of the tools mentioned above or have others that you’ve found helpful please feel free to leave a comment below.
I’ve been compressing my images for a few years now and tend to use TinyPNG.com to compress my images, but I am definitely going to check out WP Smush. Thanks for the heads up about this one! ??